The Car Barn
February 10, 2025
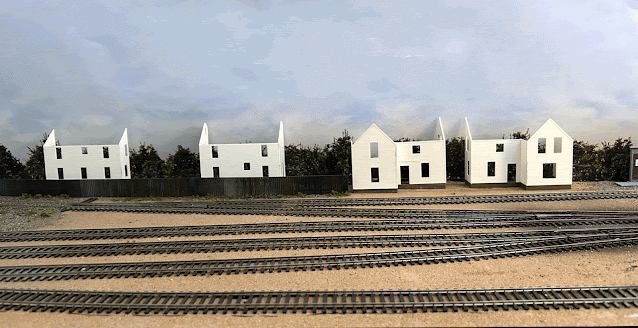
Before proceeding, it should be noted that the car barn module I am building in no way reflects the prototype Visalia Electric car barn. While the original car barn was much larger, I can't find any evidence that any significant work/servicing on locomotives following the departure of the 44-Tonners in 1972.
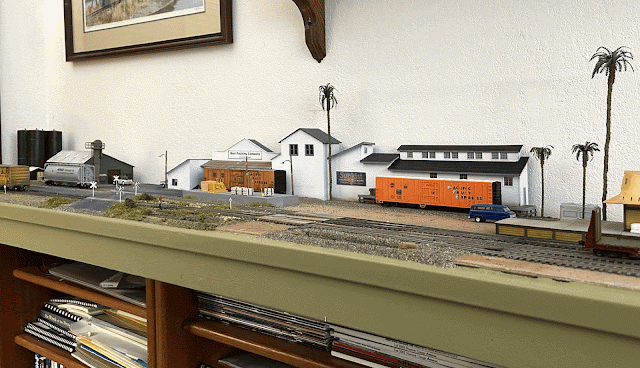
The layout's original configuration had the car barn located on the far end of the module that runs under the window on the east wall as shown below. At the time, I planned to stage inbound traffic for operations on the Redbanks siding in front of the depot.
Following the initial operating sessions it became pretty clear to both me and my fellow operator (my grandson) that staging inbound cars on the passing siding didn't work very well. At this point the decision was made to replace the car barn and servicing tracks with a small interchange yard and that the locomotive and caboose would layover in the yard.
The car barn was then set aside for some future point in time when the layout would be extended to the south wall and more room would be available; about 11 feet versus the 7 feet in front of the window. The other day, I finally decided to do something with the car barn. I cut a piece of 1 inch thick pink foam 12 inches by 36 inches. painted it a earth color and set the car barn and small office building in place. The concrete pads and walkways were made from left over wall sections from a Walthers modern warehouse building.

The Walthers engine house (car barn) kit is a typical Cornerstone offering which is not a bad model. Unfortunately, the roof sections in my kit were bowed which made it impossible to to get a good fit along the ridge line. I solved this problem using a method employed by fellow modeler Keith Johnson. A couple of years ago, Kieth told me he used ACC to fill the gaps on some plastic models. I followed his advice and used Zap-A-Gap to fill the opening. It took two applications but once the ACC had cured and the seam smoothed with sanding film the gaps were gone! You do have to be careful with the sanding since the ACC is harder than the surrounding plastic.
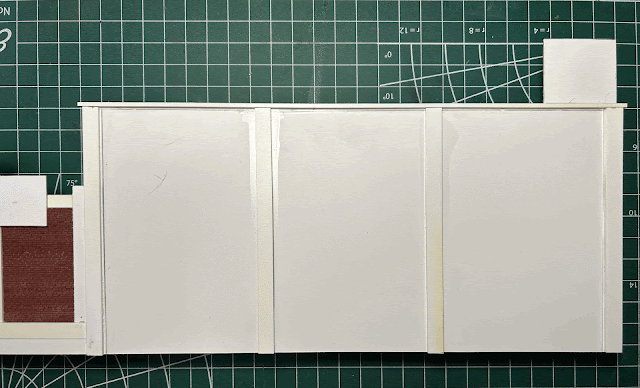
As mentioned above, the concrete walkways and pad were made from left over Walthers modern warehouse wall sections. They were cut to length and width using the expansion joints as a guide. The edges were finished with .080" by .125" strip styrene. The edges were then slightly rounded with sandpaper.
In keeping with my desire to keep costs under control, I went back to
leftovers for parts. I found a tank that was missing an end so I
fabricated a new end from sheet styrene, painted the end to match the
existing paint and added some piping made from a plastic sprue. I'm not
sure as to the origins of the small building next to the tank. Again, I
found it loose in the leftovers. Now with a place to store diesel fuel
a way was needed to fuel the locomotives. The leftovers also yielded a
American Limited kit for a couple of Snyder fuel cranes.

That small white building shown in the above photo in now being used as a speeder shed. Since this picture was taken, about half the ties have been removed from the track leading to the shed. I'm not sure if any kind of formal sanding facilities should be installed. After all, why would a railroad, with virtually no grades and short trains need a sanding tower of any kind. Instead, for now, the small shed between the office building and car barn contains a few sacks of locomotive sand just in case. A dumpster and recycle bin from Hi-Tech Detail have been assembled and positioned along the side of the office. The front of the diorama has also been extended about 2".
More work will have to wait until some additional detail parts are received.
Operations with Car Cards/Waybills
February 17, 2025
Over the President's Day Holiday my grandsons' and I had several operating sessions. With the exception of the computer generated switch lists things went pretty good. While the older one managed to decipher the computer generated switch list, with some difficulty, the younger were totally overwhelmed. As a result, I decided to go back to the old tried and true car cards and waybills.
I decided to make my own car cards. They were made using Excel. They include the car type, number and most importantly a photograph in order to assist in identifying the location of the car on the layout. They were printed out on 60 lb bond paper.
The bottom of the car cards were folded up a taped in place (center). The two step single sided waybills were also made using Excel. Each waybill was color coded to match the destination (bottom left). The key to the color codes in shown on the far right.
The bins were made from styrene and spray painted with a Krylon semi gloss and a color coded label for each location was glued to the front. When cars are dropped off, the respective car cards and waybills are placed in the bin on the far left. The center bin is for layovers or off spots. When cars are ready to be picked up the waybills are flipped and the car cards are moved to the bin on the right is for pick up. The orange across the top of PFE 456507 indicates the car is to be routed to Exeter for interchange with the Southern Pacific.
The oldest, Adam (12), successfully operate the layout on his own. The two younger boys still need a little supervision.
Stake Bed Trucks and a Flat Car
Ford C-Series cab over trucks have been around since 1956. They were produced with only minor changes until 1990. Athearn has done several C-Series runs including a stake-bed. I thought one of these would make a nice addition to the Visalia Electric. A quick check on ebay found that out of production versions were going anywhere from about $20 to $26 each with postage and tax bringing the total to around $30-36 delivered to my mailbox. Then, while scrolling through the listings, I came across a flat car with two C-Series stake-bed trucks shown below for $28 plus shipping. That worked out to about $17 or $18 each. The two trucks were in mint condition and the flat car was missing a brake wheel.
I weathered up one of the trucks and immediately put it to work unloading pallets of concrete block in Redbanks. The concrete blocks came from Model Rail Stuff. I'm not sure if this company is still around but their products do show up on ebay. A few figures working the dock would be nice.
I removed the trucks and couplers from the flat car and almost tossed it in the trash. The tooling for this 60' flat is old (1970's). The car was originally part of the Model Die Casting line which was later sold to Athearn. The tooling was also the basis for a bulk head flat car. Much nicer 60' flats have been done in the meantime. The model could be improved by the addition of cut levers, separate grabs and the replacement of the existing stirrup steps. Regardless, I decided to salvage the model, as is, for my grandson Adam.
I cut the wheel chocks off with a razor saw and then used the blade to restore gaps between the deck boards. Fortunately, the wheel chocks were separate parts that had been glued to the original deck which made them easier to remove.

The deck was sanded down with some medium grit sandpaper to restore the grain and painted the craft paints. Three colors were blended together while the paint was still wet. The wheel sets and trucks got the same treatment. The brake wheel was replaced and everything, including the under-frame got additional weathering using powdered pigments. The car was then given a light dusting of Tamiya Flat. The end result is a reasonably good "layout quality" model that can stand up to some abuse! Improvements might include wire grabs, cut levers and replacement stirrup steps. Trailer Train flats with OTTX reporting marks were equipped to carry heavy ladings like farm machinery or military equipment. The prototype OTTX cars are equipped with retractable winches/tie downs mounted on longitudinal channels; something the model lacks.

As usual, your comments, suggestions and questions are welcome
sdepolo@outlook.com


